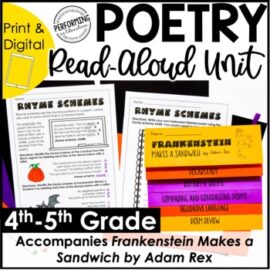
So poetry is not my favorite thing to write, and it’s not always easy to teach. This is especially true when teaching fourth and fifth-grade students when you’re dealing with lots of different types of poems with confusing rules. So, I’m going to share three ways to teach poetry and make it fun, even if it’s not your thing.
We’ll focus on how to break down those rules, make it easy for students to understand and write, and make it easy for you to teach.
1. Use Engaging Examples
So my first tip is to use engaging examples with your students. There are a lot of poems in textbooks, workbooks, and online that aren’t going to be relevant to your students. Instead, you want to find poems that your students understand. You don’t want to throw something at them that is such an old poem that you don’t even understand it yourself.
You want to start with silly, fun, and engaging poems.
Here are a few of my favorite poetry books:
- A Stick is an Excellent Thing by Marilyn Singer
- Love That Dog by Sharon Creech
- My First Book of Haiku Poems
You can also go to your local library and find many poetry books for kids. Check out the ones with the best examples of the types of poetry you’re teaching. Then, you can bring those books into your classroom and immerse your students in the poems.
You want poetry to be all over your classroom while teaching it. Again, it may not be your favorite thing, but the more it’s in the classroom, the more you and your students will engage with it.
If you’re interested in using anchor charts with engaging examples to help illustrate the different types of writing for students, you can download these free Poetry Anchor Charts. This resource includes all the different types of poems we teach in upper elementary. They use engaging pictures and fun poems while also highlighting the rules.
These anchor charts are great to use in your classroom with students. They catch their eye and immerse them in a poetry experience while focusing on the key rules for the different types of poems.
Learning about the different types of poems is really just about looking for the patterns and rules that go with them. It takes a lot of practice and is something you can’t just teach in a couple of days. So, it will be something you do for a while, which leads me to my second tip.
2. Annotate the Poem
You want to give your students a lot of examples they can write on. Reading poems together is great, but you want to have some poems where students can actually observe something and write it down. For example, you want them to be able to label syllables, the number of lines, rhyming words, and anything they notice about the poem.
They might not notice more than the actual rules, and that’s okay. But we want to have students look deeply at the poem’s structure to identify what type of poem it is and what rules go with it.
So the anchor charts you get in the free resource mentioned above can also be printed small. For example, I like to print them two to a page and have students cut them out after they annotate so they can paste them into their notes.
Example
You will walk them through the process of looking for patterns and rules as they’re annotating. So let’s use a limerick poem as an example.

Your students may notice the poem is kind of silly. They should also notice there are five lines. The first, second, and fifth lines rhyme and have seven to 10 syllables.
This poem is kind of a complicated structure because the third and fourth lines also rhyme and contain five to seven syllables. These patterns are very complicated, especially with a limerick. So noticing this is going to be a little tricky for students. So, you’re going to walk them through the process, have them annotate it, and then do multiple examples.
I like to do this by introducing one type of poem each day and then spending a few days on multiple types of poems while comparing and contrasting them. Doing it this way makes it a lot easier for students to be able to work with various types of poetry and how to identify them.
3. Do a Collaborative Poem
Work together with students as they start to write poems. We want to begin together so they know the process and how to use the rules. So, we can brainstorm ideas together and write a poem with the correct structure using our ideas.
If we don’t do one as a group, we’re basically throwing our students in without a process. Doing this tends to result in them not following the rules or getting really stuck. I have a hard time writing poetry, so I can only imagine my third, fourth, or fifth graders and how they feel about writing a poem when they’ve never written this type of poem before.
So, writing a collaborative poem as a group is really important. That way, students know the process. Then, when they’re more comfortable, you can move into having students do this in small groups or with a partner. Eventually, you can have them work independently.
I know this sounds like a lot of time spent on teaching poetry since you’re working on it every day for almost two weeks if you add all these activities together. But I think that poetry is something you should spend time on.
Not only is it developing writing skills, like descriptive writing and formatting, for your students, but they’re also building amazing reading skills. They will be able to look at a poem, identify the rules and patterns, and have opinions on them. So, there are actually a lot of standards that poetry covers.
Resource for Teaching Poetry
So those are my three tips for teaching poetry, even if you’re not in love with it.
Don’t forget to download my free poetry anchor charts to try in your classroom. You can print them full size to use on bulletin boards. Or, if you want students to use them in notebooks, print them two to a page.
If you want to learn more tips to make teaching writing easier in your classroom, including free resources, subscribe to my YouTube channel.


