 Students must keep the first four pages of their notebook free for a table of contents. Most likely they will only fill two pages, but students with larger handwriting may need the extra pages. I have the students paperclip these four pages together, and keep them paper-clipped until they use them. This prevents them from accidentally writing where their next page of contents will eventually go. My students must include the name of the section, the standard it meets, and the pages where they can find the material. Because it’s usually a range of pages for each topic, I often have students leave the page number blank, then we go back and write the page numbers on completion of the interactive notes for that section. I model this procedure for the first five times we add something new to our notebooks. I continue to monitor that it’s done correctly by collecting the notebooks weekly.
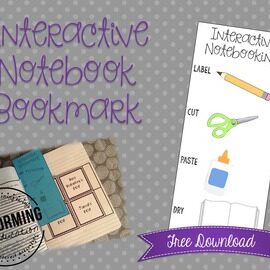
 When I started using interactive notebooks many years ago, my students would take 20 minutes just cutting. Not only does this look horrible if anyone is observing your classroom, but you’re wasting instructional time. The amount of time your students spend cutting and pasting should be 1% of the time they are using this notebook to practice or apply. The first part of this procedure is to have supplies ready. I keep the scissors in a bin in the middle of the desks. My students have 60 seconds to have supplies out and pages open and labeled. We use post-it notes to mark the next page in the notebook, so that students can open to that page quickly. I’ve seen some great ideas on Pinterest for adding ribbons as bookmarks! You can also download a free bookmark from my store:
The second step of this procedure is the cutting. If you have younger students, you will have to set more time aside for this step, or you may want a parent volunteer to pre-cut some of the pieces. With my 4th-7th grade students, I set a timer for 5 minutes. I prefer to use a digital timer that I can project onto the board so that students can see how much time they have left. Students who are done early know that the next step is to help someone at their group finish cutting. Here’s an example of what this looks like: Student A finishes in two minutes. Partner B is still working, so he tears off part of the page he is working on and Student A cuts the pieces from that part of the page. Make it clear that students that aren’t finished when the timer goes off need to set their scissors aside and follow the lesson until there is a break for them to finish cutting their pieces. I have these students come in during lunch to finish, so it’s rare that I have any students who aren’t finished when the timer goes off. If you have a student with special needs, assign them a partner or provide them with pre-cut pieces.
What do you do with all the trash? I have two medium shipping boxes that my helpers take around the class to pick up all of the pieces. They empty the shipping boxes into my large recycle bin, which I take out once a week. These helpers also look for scraps on the floor that need to be picked up.
My class can have everything cut out and a clean working area in less than 6 minutes because I consistently remind them of our procedures. Yours can too!
Procedure 3: Glue Use

Procedure 4: Absent Students
Procedure 5: Using Interactive Notebooks
Before we do group work or independent practice, I tell my students which section their notebook should be open to for reference. Throughout the year, we play the Table of Contents Race, where I show them a problem or question, and they race to find the notes they need to complete/answer the question. If we’re reviewing for a unit test, I teach the students that they have to show an effort to find the notes in their notebook before I will help them locate the correct information.
If a student raises their hand and tells me they can’t find the information they need, I rarely tell them where it is. I ask them guiding questions until they find it themselves. It may take a little longer than just telling them a page number, but it will save you time in the long run because you are giving them the skills to find it by themselves.
Model using your own notebook from time to time, and always praise students who use theirs correctly!
How do you use interactive notebooks in your classroom?


thanlap says
This was super. Thanks!
Susan Kelleher says
Excellent tips for using interactive notebooks! I just started an interactive notebook linky party and this post is perfect! I hope you will link this post up!<br /><br />Susan<br /><a href="http://passioninportableland.blogspot.com/" rel="nofollow">PassioninPortableland</a>
Mrs. Smith says
Michele,<br /><br />I do the exact same thing with notes, and I use red too! Great minds! Thank you for sharing the tip!
Michele Jackson says
Mrs. Smith,<br />These are great interactive notebook tips to remember! Especially the glue :)<br />We use the interactive notebooks daily in class. To help kids know what to write down… (I really mean so I don't have to answer "Do we have to write this down?" 100 times) I have a color coded system. They have to write down anything in red. They are always free to rewrite the
Candace Williams says
Yall you for sharing! This will be my first year using interactive notebooks so this information was very helpful! A lot of things I hadn't even considered!!! Do you allow your kids to take their notebooks home or do they stay in class?
Mrs. Smith says
Thank you Candace! I have them keep them in class. I've found that when they take them home, they come back missing papers (if they come back at all).<br /><br />I also have them use a large binder clip to keep their composition books closed and everything inside.