When the nation first made the transition to virtual learning in March, I heard many teachers and administrators having honest conversations about the amount of content that teachers would be able to get through by the end of the year. We all discovered that the shift to virtual teaching took more planning time and more instructional time, leaving us to reconsider our instructional priorities. And I’ll be honest with you–the first aspect of instruction that I shoved to the backseat when teaching virtually? Grammar. Yup, I said it–grammar lessons were absolutely last on my list.
Until I realized they didn’t have to be.
I began thinking about interactive notebooks and how to tweak them to make them truly interactive for virtual learners. I found that, with a bit of initial effort, I could create interactive notebooks that guide virtual students through note-taking, skill practice, and assessment. Let me break down my step-by-step process for you below.
Step 1: Teach a Brief Grammar Lesson
Start your week with a brief mini-lesson—and yes, we mean brief! According to Choice Literacy, a mini-lesson should run between seven and fifteen minutes, depending on the age of your students. So, on Monday, plan a focused grammar lesson. Use a teaching point, a student-centered “I can” statement, and a video or quick slideshow to support the visual and auditory learners in your virtual classroom.
Step 2: Model the Grammar Skill
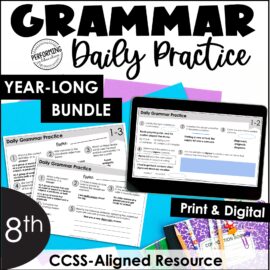
There are many apps and websites that will allow you to visually model the do’s and don’ts of English grammar. You can simply use Zoom’s whiteboard feature to demonstrate the skill, or you can get a little more fancy, such as using an interactive Google Slide like the ones found in this bundle.

Step 3: Allow Students a Chance to Practice the Skill in Small Groups
By Tuesday or Wednesday, I give students a chance to practice applying the target skill in pairs or small groups. I’ll assign students a short activity that should take no more than ten minutes to complete and five minutes to review. Often, I’ll create an interactive slide on Google Slides to allow students to virtually manipulate by dragging and dropping answer choices, highlighting specific parts of a passage, and etc. Using Zoom’s Breakout Rooms feature, I divide students into their groups, and bounce around the breakout rooms to check on each room’s progress. Here, I can provide feedback and ensure all groups are staying on task.

Step 4: Students Practice the Skill Independently
By Thursday, students should be able to practice applying the target skill independently. Once again, I provide students an activity, like an interactive Google Slide, and keep the independent activity less than fifteen minutes—that includes student completion of the activity and whole group review.

At this stage, I do not put students into Breakout Rooms. Instead, I ask all students to mute their mics, put on some classic study tunes, and screen share a pre-set timer. Students use the Zoom chat-box to ask any questions they have about the activity, and if I find that one or several students are struggling to independently apply the skill, I will then open a Breakout Room to provide individual or small group instruction.
Step 5: Using Google Forms to Assess Student Understanding

After assessing student understanding throughout the week, I decide if students are ready for an informal assessment or require reteaching. If – and when – I find them ready for informal assessment, I assign a brief “quiz” on Google Forms. Again, the quiz should take students no more than ten minutes, and you may choose to have them complete it while entering class for “bell-work,” or at the end of class, as an exit ticket. With just a tad bit of leg work before assigning them, these Google Forms assessments can even self-grade, leaving you some time to ahhh— just chill over the weekend!
Want more? Check out our previous post on grammar mini-lessons here.