Have you heard the term makerspace and want to know more? A makerspace is more than just a buzz word. Including a makerspace in your classroom will help students develop problem solving skills and perseverance while being actively engaged in hands on learning.
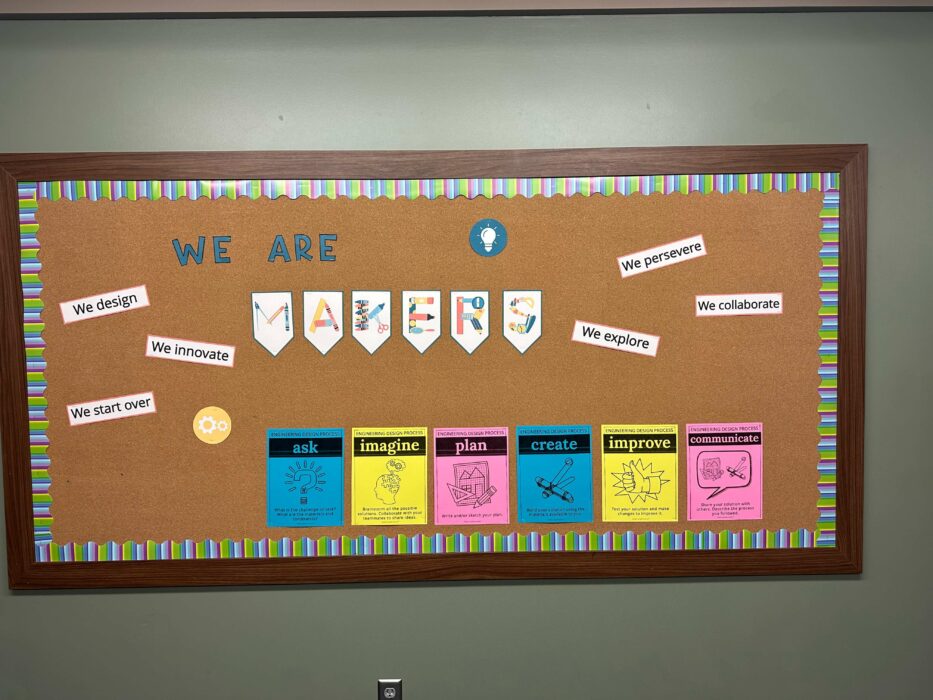
What is a Makerspace?
A makerspace is any area in your classroom or school that contains organized materials that students can use for hands-on learning using using the engineering design process. Your makerspace can be as big or small as needed. It can be an entire section of the library that the entire school can use or a shelf in your classroom. It can include a large assortment of expensive STEM materials including Ozobots, Keva planks, and a 3D printer, or be as simple as organizing materials that you already have on hand such as cardboard, cups, craft sticks, and pipe cleaners.
In my experience it is a great idea to start with a small area and use what you already have in your classroom. Try it out to get a sense of how much time you are going to be able to use it and look for specific STEM (science, technology, engineering, and mathematics) activities that you plan to implement and see what materials they require. Then expand your makerspace as needed. Ask parents for donations or write a grant once you know what you need.
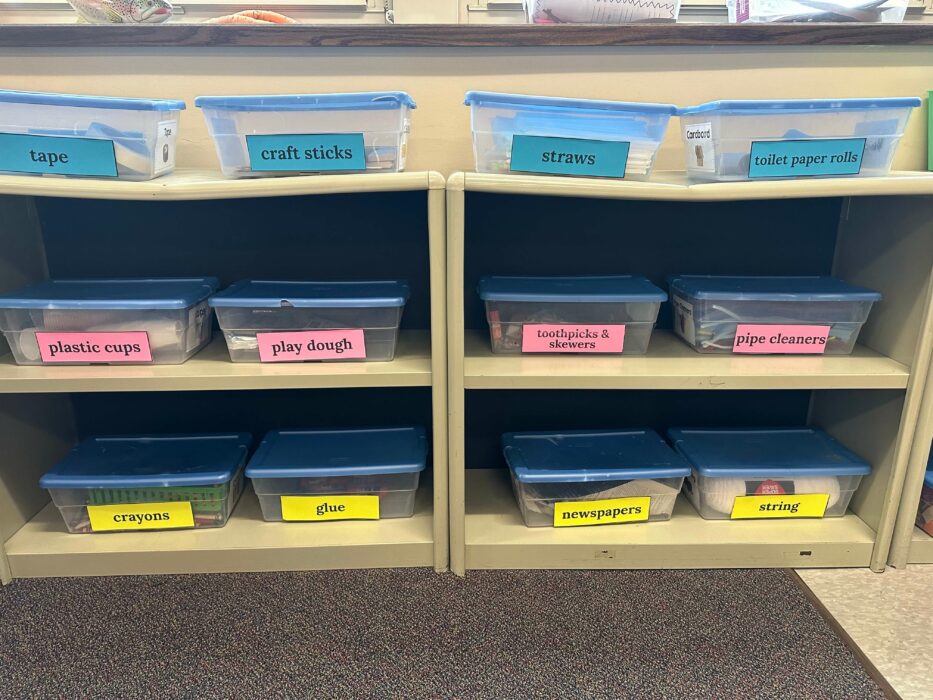
Plastic bins work well for storage. I personally like bins with lids so that they can be stacked. It is a good idea to label both sides of bins so that they can be put back in any direction. Some people also like to label the shelf so that the bins always get put back in the same spot.
Why should I have a makerspace?
When using a makerspace students learn to:
- Persevere
- Problem Solve
- Take Risks
- Cooperate
- Develop skills for the future
Persevere
When faced with a difficult problem, many students immediately stop trying. When using a makerspace, students are less likely to stop. They are actively engaged and have a team depending on them. They also have a limited amount of time and are motivated to complete the task.
Problem Solve
Students learn to problem solve when using a makerspace. Unlike a math equation, there is not just one set of correct answers. There are lots of possibilities. Even if there are limited materials or time, students can use these materials in any way that they see fit. They have to try lots of different things to learn what will work best. There is not one correct solution. Students will observe different groups trying different things and they can all be successful.
Take Risks
Students also learn to take risks in a safe setting. They can experiment and know that if it doesn’t work, they can just start over. If they are building a tower of cups, no harm is done if they fall to the ground. They can rebuild and try again and be more successful. This creates a classroom community in which students develop a growth mindset and aren’t afraid to try new things. I have seen this carry over in my classroom to other subjects too. Once students are comfortable in the learning environment, they are then more willing to answer a math or reading question in front of the class too.
Cooperate
Another important skill that is learned when using a makerspace is cooperation. Students must communicate well with their group members in order to be successful. They must listen to others and use the best ideas of each group member and utilize them to create the best solution. When students in my classroom begin STEM projects I always give them the first ten minutes to imagine and plan on their own. Then I give them the next ten minutes to collaborate with their group. This allows them to come up with their own ideas before being influenced by others so that the group can benefit from the best parts of everyone’s design.
Employability Skills
Finally, a makerspace can help students develop engineering skills and employability skills that they will require in the future. Students will use the engineering design process to ask, image, plan, create, and improve a design. They must also learn to take on a variety of roles, use their time effectively, achieve a goal and be held accountable for their performance. These are all skills that will help them in the future in whatever career they choose.
What does it look like?
The Makerspace Challenges guide from Simplify Science includes 32 challenges that can be completed with simple materials. It also has an engineering design graphic organizer for students to record their process and reflection questions to use with the group after the challenge.
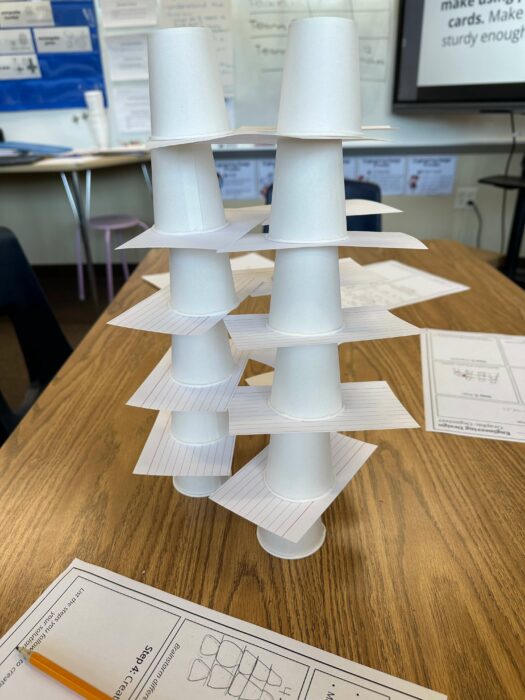
I had a group of fourth grade students complete Makerspace Challenge 1. First, I presented the challenge on the screen in my room from the slide deck. The challenge stated: “Create the tallest structure you can make using plastic cups and index cards. Make sure the structure is sturdy enough to stand on its own.” Students were assigned groups of three to four people. They had to record the task and materials under the ask section of their graphic organizer. I then had them complete the imagine box independently. They had to brainstorm ideas of what their structure might look like. When everyone in the group was finished, the group worked together to sketch a plan in the plan box. They then began creating. I gave each group twenty small cups, twenty index cards, and ten minutes to create, but these can be adjusted based on your needs. I allowed students to measure with a yardstick as they went along and we recorded their measurements on the board. This allowed them to keep their highest height, but continue to experiment.. At the end of the time, they completed the improve section of their graphic organizer and we reflected as a whole class. Students were able to identify what went well, what was challenging, and what materials they think would be really helpful to make this challenge easier.
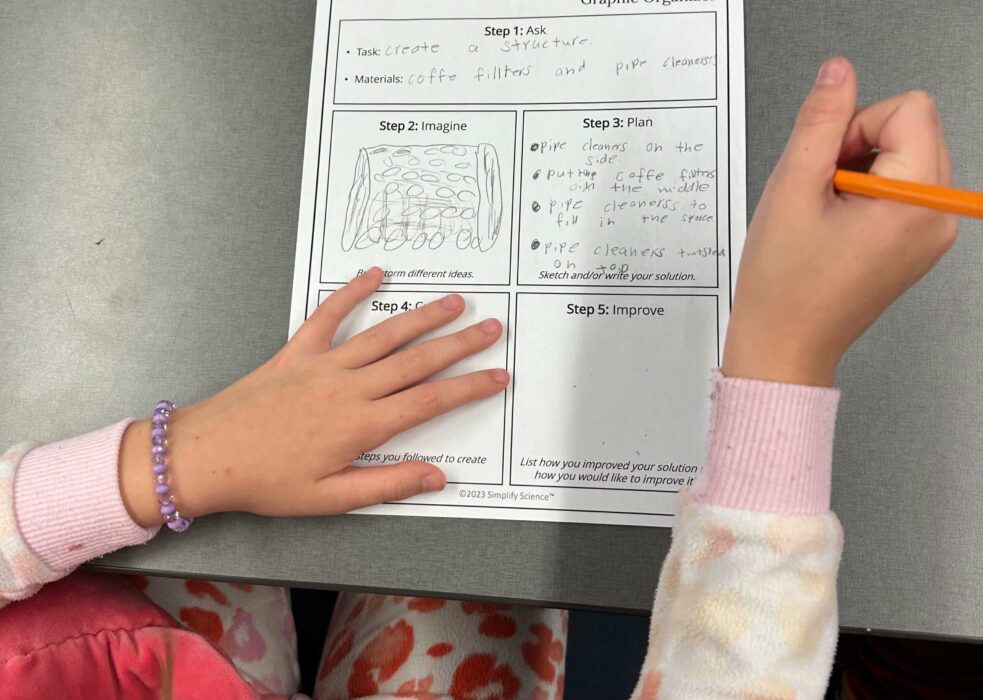
Using a similar model as above, I had a group of third grade students complete Makerspace Challenge 5. They were asked to create a structure that was able to stand on its own and be at least six inches tall using only coffee filters and pipe cleaners. When they first heard this task they thought it would be easy, but they quickly realized that the materials were not sturdy enough to create a structure with height. They had to problem solve in order to be successful. As they kept building, they learned how to move the pipe cleaners in order to support the coffee filters up higher. They did not even realize that they were persevering and problem solving, but they knew that they only had a short amount of time and had to make something work. I did not have any students give up and every group was successful, even though they accomplished the task in different ways!
Getting Started
Are you ready to get started? Here are my top 5 tips for getting started with a makerspace:
1. Collect Recycled Materials
Start small by collecting recyclable materials that you can add to your makerspace. These include cardboard, paper towel tubes, toilet paper tubes, plastic bottles and shoe boxes.
2. Organize Materials
Put materials in plastic bins with labels. Show students how and where to put away supplies to keep the area organized.
3. Provide Guidelines
Start by creating guidelines for using the makerspace with your students. Have students sign a contract that they agree to use the makerspace materials appropriately.
4. Teach About Growth Mindset
If students are unfamiliar with this type of activity, they may become easily frustrated. Start by teaching them about growth mindset so they learn the power of perseverance.
5. Celebrate
Help students understand how they were all successful. Share some of the skills that they developed and take photos of their successes. Share these on social media with their parents or put them on a class bulletin board so they can see how they persevered to solve a problem.
A makerspace can be a great addition to your classroom environment. It is easy to set up and can be set up with little cost. Students will learn a variety of lifelong skills and you can incorporate engineering science standards in a fun and engaging way!
